I’m certain I’ve said it before, but Friday pizza night is a huge staple in our home. Our family did it growing up, I’ve continued it in my marriage, and now I can’t wait to share the tradition with our little one who will be here in THREE WEEKS! Pardon me while this blows my mind…still can’t believe we’ll be meeting our baby so soon!
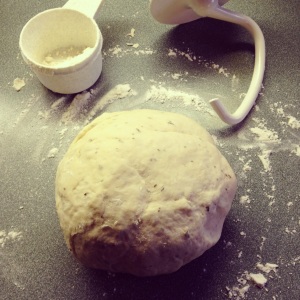
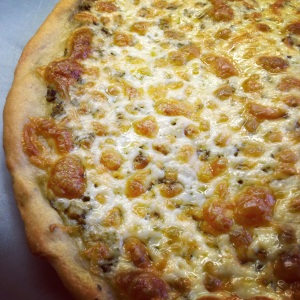
I’ve used the same homemade pizza crust recipe for the past 3+ years and have been totally happy with it, so you know it’d take an awesome new recipe to make me change my ways. I saw this recipe for garlic bread pizza crust and my eyes were sold by the delicious photos alone. It’s a pretty straightforward recipe, but is smothered in extra butter, garlic, and parmesan at the end. Ya know, if that’s your thing. I followed the full garlic extreme recipe the first time I made it and was in heaven, and then tried it again without the extra additions. (photo at the top is the toned down version, photo below is the full blown garlic bread type) The simple version was of course a bit healthier but still full of flavor and has a perfect texture. And as you can see below, the full recipe has the extra buttery, cheesy, garlic blasted goodness around the edges which is decadent and a nice indulgence once in a while. The recipe is meant to make one pizza – we don’t like crazy thick crust so I actually divide it in two get double the pizza out of one batch of dough. And as you can see, it’s still not super thin!

In fact, this two for one has been a big time saver! On one of my days off, when I have the time to make a full batch of dough, I’ll divide it in two and then freeze them for the next two Fridays. SO easy! To do this, after letting the dough rise for the 1 1/2 hours, take two plastic zipper bags (quart size works for me) and spray the inside of the bag with olive oil or non-stick spray. Divide the dough into two, put one half into each bag, and pop them in the freezer. Then, just put the dough into the fridge for about a day before you’re going to use (I transfer mine on Thursday nights) to defrost. Then while you’re prepping your pizza ingredients on the day of, take the defrosted dough out of the fridge to come to room temp, roll, top, bake, and enjoy!
Garlic Bread Pizza Crust
Ingredients:
1 1/8 cups warm water (100-105 degrees)
3 tsp active dry yeast
1 1/2 Tbso honey
1 1/2 Tbsp olive oil
3 cups all-purpose flour
1 tsp salt
1 tsp garlic powder
1 tsp dried basil
Whatever pizza sauce and toppings you want!
Optional – for extra garlic bread flavor:
5 Tbsp unsalted butter
2 garlic cloves, pressed or very finely minced
2 Tbsp parmesan cheese
Yield: 2 pizza crusts
Directions:
In a large bowl, combine water, yeast, honey, and olive oil. Mix with a spoon, then let sit until foamy, about 10 minutes. Add in 2 1/2 cups flour, salt, garlic powder, and dried basil, stirring with a spoon or mixing with a dough hook until the dough comes together but it still sticky. Work the additional 1/2 cup flour (you don’t need to use all if it is not needed) in to the dough, kneading it with the dough hook or using your hands on a floured surface for a few minutes. Rub the same bowl with olive oil then place the dough inside, turning to coat. Cover bowl with a towel and place in a warm place to rise for about 1 1/2 hours.
Preheat oven to 375 degrees F.
After the dough has risen, punch it down and place it back on the floured surface. Using a rolling pin or your hands, form it into your desired shape on a pizza/baking pan. Place the towel back over the dough and let sit in the warm place for 10 minutes.
Continue to make your pizza with your desired toppings. Bake the pizza for 23-25 minutes (or longer if needed, depending on your toppings), or until crust and cheese are both golden. Let the pizza set for a minute, then slice and serve!
If going all out with the garlic bread flavors:
While the dough is rising again, melt 3 Tbsp of butter. Mix it with the garlic and 1 Tbsp of parmesan cheese. Before adding your pizza toppings, using a spoon or pastry brush, douse the outside edges with the butter and garlic mixture. You can spread the butter all over, just make sure to focus on the edges. Use it all up! While the pizza is baking, melt remaining butter and combine with the last Tbsp of parmesan. Remove the pizza from the oven and immediately brush the outside edges with parmesan butter, using it all up. Sprinkle a bit of parmesan over the top and serve!
Source: How Sweet Eats
Tags: baking, bread, butter, crust, garlic, parmesan, pizza


